Late Stage Flower Management: Finishing Strong Without Stress

Welcome back to another Mills Nutrients x TB Seeds crossover. The collab that dreams are made from. First, we had to capture the great mind that is The Mills Master Grower. We tracked him down to an Ikea return section covered in meatball sauce. We have since returned him to his natural habitat: the grow room. This time, he wants to talk about late stage flowering, that part of the cycle where growers should be holding their nerve, not losing their minds. By this late flowering stage, the hard work is already in motion. The flowers should be building, the aroma more present, and the harvest finally starting to feel real. For some growers, this is twitchy bum time, and they get tempted to change feeds or introduce a new ‘wonder’ product, trying to fix something that wasn’t broken. When late flower kicks in, don’t panic. It is the time to support the finish properly, keep stress low and let the plant close out the cycle cleanly. That is where timing, restraint and the right support matter. And that support comes in the shape of Doc, the Mills Master Grower. He’s on hand to guide you through late flowering and to show you which Mills product to use and when. Don’t say we don’t look after you, because we hear that a lot from the Doc. 1. Late Flower Is About Finishing, Not Freestyling By late flower, the plant doesn’t want to change it up; it just wants to get to the destination. It wants an open road to the finish. Some growers might get itchy fingers or start ignoring the feed chart. Stick to the plan, it’s there for a reason. Late flowering is more about bringing everything together without knocking the plant out of rhythm. If it has come this far in decent shape, your role is not to suddenly become a mad scientist in a grow tent. You know the old adage: if it isn’t broke, don’t ruin your crop trying to fix it. At this stage, if the plants get stressed, it shows up fast, and it’s not pretty. Leaves discolour, flower growth stunts, and the plant looks like it’s trying to tell you you’re about to undo all the good work. The Mills Master Grower says the same thing, but with less patience and more swearing: if the crop is moving well, let it finish strong. A grower checks late flowering cannabis plants in a controlled indoor room during the final weeks of flower 2. Why Growers Start Meddling Right at the End The late flowering stage sends some people over the edge. So much work and patience have gone into getting that far, and the harvest is starting to feel close enough to taste. Yet, as soon as the buds start filling out, some growers can’t resist tinkering. A tweak here or there can stunt your finish. The final stretch needs support and stability, and for the most part, the plant should be left alone. Some growers think more input equals more output, but it usually just means stress and hassle for your plants, at a stage with much less margin for error. Late flowering cannabis plants finishing under stable indoor conditions with support stakes and a tidy feeding area 3. Use the Right Support, Not Just More Support When plants reach late flowering, the right product can either earn its weight in weed, or it can stifle the end of your cycle by getting in the way. Simply utter the words “Ultimate PK” around Doc, and be ready for him to explain in detail why it’s ideal for late flowering. Because at this stage, your plants want a little bit of support, not drastic change, that’s why Ultimate PK, if used properly, can close out the grow cycle without making drastic changes to the feeding schedule. Late flowering cannabis plants finishing under LED light in a controlled indoor room with support stakes and a simple nutrient shelf 4. Keep Stress Out of the Finish Like when the Doc discovers the cookie tin is empty, late cannabis flowering is not the time to test the patience of your plants. By now, most of the hard bit has been done. The stretch is over, the flowers are stacked, and it’s worked for weeks towards the finish. The last thing it wants is stress. A room overheating or a feeding plan going off schedule. And like every time we want him to do something, The Master Grower has an answer for this. Mills Vitalize. If the crop stays healthier, stronger and less rattled by stress, it has a much better chance of finishing the way you wanted instead of limping over the line looking like it has seen things. The Master Grower would put it more bluntly and say late cannabis flowering is not the time to have an identity crisis. Your plants know who they are, even if you don’t. Sit on your hands, put them in your pants, do whatever you need to keep your crop from getting upset. A controlled indoor grow room showing late flowering cannabis plants under stable temperature and airflow conditions 5. Know What a Strong Finish Looks Like A good finish should not be an Olympic-style photo finish. Nobody needs a cannabis plant flopping over the line through exhaustion. Nor do they want to see their plants throwing one last performance before harvest. What you’re looking for is for the crop to keep its shape as it matures and pushes to the finish line. The plant should look healthy with no signs of stress. Solid structure, good buds and no sign of you trying to participate when you should be in the stands. The Doc’s view is not complicated (shocker). If the plant looks like it is finishing properly, give it the space to do so. Late-flowering cannabis is about keeping the quality that is already there. At this point, you’ve got what you’ve got. Messing around with
The Bulldog Seeds x Mills Nutrients: How to Transition from Vegetative Growth to Flower
The Mills Master Grower is back. We found him in the kitchen at The Bulldog HQ and got him back into the grow room to bring you another TB Seeds x Mills Nutrients crossover. At Mills, they call him The Doc; you call him what you want, but be aware, he bites. The switch from veg to flower should feel as easy as a Sunday morning, yet sometimes, it’s harder than a 9-5. When it’s time to flip the switch, plenty of growers lose momentum. They change too much too quickly. The feed changes, a new light cycle emerges, expectations shift, and then some growers hammer their plants with bloom products. All of which is a good way to slow things down just when your crop should be building pace. The early flowering stage still asks a lot from the plant. It is stretching, building a structure and setting up future flower sites at the same time. If the base feed gets shaky or the transition is handled too aggressively, the plant usually lets you know one way or another. That is where the Mills Master Grower has got you covered. The Doc will see you now. 1.The First Weeks of Flower Are Still About Growth This is the bit growers sometimes get wrong. They make the flip to flower and expect the plant to stop growing and start stacking cannabis cup-winning flowers. When the plant is in early flower, it’s still growing; it’s just that the aims have changed. Shortly after the flip, plants begin to stretch, build shape and develop flowering sites. If you go too hard too soon feeding during the bloom, you can knock the whole balance of your crop off kilter before it’s properly got going. That is why the first couple of weeks after the flip matter so much. The plant still needs stability. It wants a solid base to keep growth moving through the gears. This is not the time to panic and attempt to overcorrect and start pouring in every bloom product you have ever been told will make the flowers explode with THC. A good transition should be controlled, with a healthy-looking stretch. that has strong tops and good leaf colour. You want to see early signs of flower development without the plant looking like it has just been through a few rounds. If that sounds obvious, good. Growing usually gets harder the moment people stop doing the obvious things well. A wide indoor grow room scene showing cannabis plants moving from vegetative growth into early flower 2. Why Growers Lose Momentum at the Flip Growers do not suddenly forget how to grow. They lose momentum because they change too much at once and expect the plant to keep up. They can lose momentum, though, because they change too many things at once and expect results right away. Some growers might start seeing plant changes that make them nervous and throw the grow book at it. Many growers also make the mistake of treating early flowers as finished products. They see the flip and start feeding as if the plant should already be focused on swelling buds, when really it is still trying to stretch, build structure and settle into the new phase. Cannabis plants stretching into early flower under LED lighting during the switch from veg to bloom 3. Keep things steady If the transition from veg to flower is going to go well, the base feed must be consistent. As we’ve said, the plant is still growing, still stretching, and still building the structure that will carry the flowers later on. Now (never) is not the time to start guessing. This is where Mills Nutrients pulls through with Basis A & B to do the steady work. Basis A & B provide the plant with a consistent foundation as it transitions, which is exactly what you want as the crop begins to flower. This is usually where growers either keep momentum or lose it. A stable base helps the plant move cleanly into flower without the stop-start feel that comes from changing too much too quickly. If the foundations are doing their job, everything else has a much better chance of performing well. 4. Bring C4 In at the Right Moment C4 works best when the plant is properly moving into flower and ready for a bit of a boost. Get the timing right, and it helps the crop carry on without much stress. Jump in too early, and you are back to changing things for the sake of feeling proactive or to ease yourself in. The Master Grower says keep it simple by using Basis A & B for the steady work, then bringing C4 in when the plant has actually started to flower. Don’t do stuff for the sake of it. And definitely not because you saw one pistil and you’re dreaming of cutting it down next week. 5. Build the frame Some growers see early flowers and lose all sense of timing and logic, overthinking every move, and that’s where mistakes are made. Overfeeding your plants with bloom products at this stage will confuse your crop. At this stage, the plant is still about building the frame. This is not the time to try to impress anyone. The Master Grower did not stand there applauding because you used more product. He is usually muttering something unrepeatable, with a cheese sandwich in hand, while looking at a plant that was doing perfectly well until someone thought it was hungry for the wrong food 6. What a Good Transition Looks Like Transitioning from veg to flower should see plants stretching but not collapsing under their own weight. The tops develop a solid structure with healthy leaf colour, and the first flower sites should appear without causing crop stress or banging a drum. When things go well, flipping from veg to flower is seamless. The room is stress-free, and the plants meet milestones on time without drama.
The Pros and Cons of Growing Cannabis in Soil
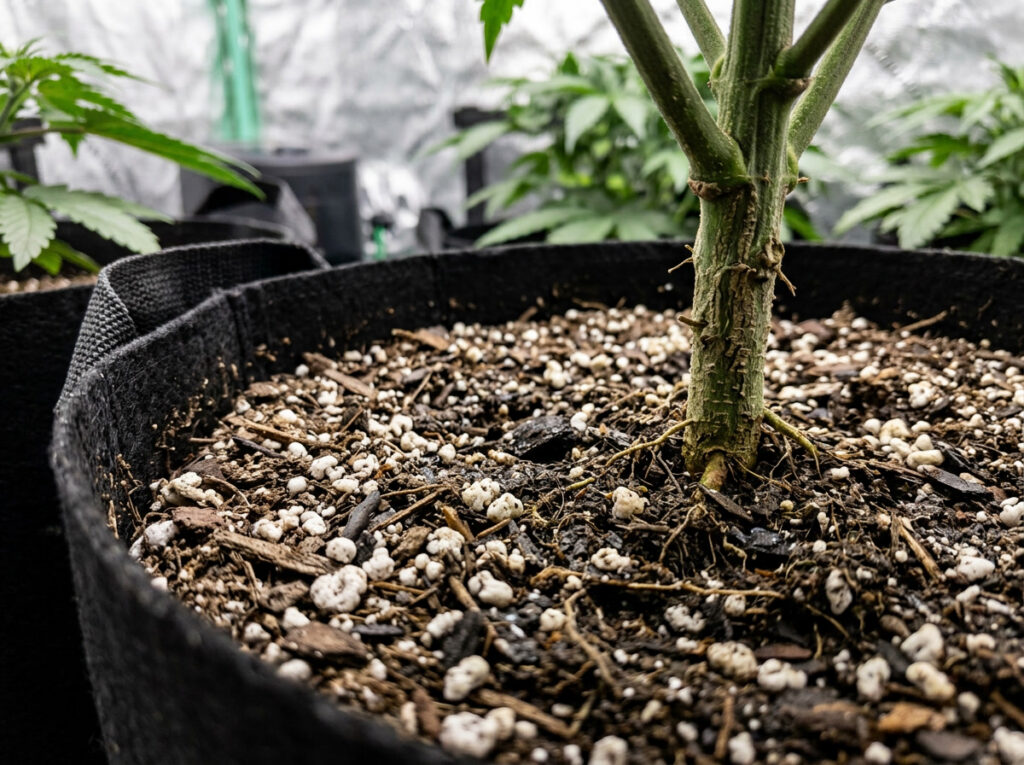
Soil has been doing the job for a long time, and for plenty of cannabis growers, it still makes the most sense to continue growing cannabis in soil. It is simple, dependable and does not require a shelf full of equipment to get going. That does not mean it is the only way to grow. Hydroponic systems have their place, and in the right hands, they can produce excellent results. Still, not every grower wants a setup full of moving parts and constant checks. Soil gives you a more forgiving growing medium, a more natural feel and, for many people, a more straightforward way to grow cannabis. Before you decide whether to stick with soil or start pricing up a hydro system, it helps to look at both sides properly. Pros of Growing Cannabis in Soil Soil Does a Lot of the Work for You One of the big pro’s of growing cannabis in soil is that the medium already brings plenty to the table. A good soil mix contains nutrients, beneficial microorganisms and the kind of natural support that helps cannabis plants establish healthy roots and steady growth. For growers who want a more natural setup, that is a big part of the appeal. A close-up look at soil texture and perlite in a cannabis fabric pot It Is More Affordable to Get Started Growing cannabis always comes with some cost, but soil is usually one of the more accessible ways to begin. Compared with hydroponic growing, you need less equipment, fewer moving parts and a much smaller upfront spend. That makes soil a practical choice for beginners, home growers and anyone who wants a reliable setup without turning the grow room into a plumbing project. It Is More Forgiving for Beginners Soil is also easier to work with if you are still learning. That does not mean you can ignore the basics, but it does mean small mistakes are often easier to recover from than they would be in a hydro setup. Growing cannabis in soil usually involves less day-to-day monitoring, and the medium gives growers a bit more breathing room when things are not absolutely perfect. A healthy cannabis plant growing in soil in a simple indoor setup It Has a History Behind It For some growers, this still matters. Soil is the traditional growing medium, and cannabis has been grown this way for generations. There is a reason it has stuck around. It works, it is familiar, and for plenty of people, it feels like the most natural way to grow cannabis. Not everything old needs replacing just because somebody put a pump on it. Soil Keeps Things Simple Another big plus is reliability through simplicity. Hydro systems can deliver strong results, but they also require more equipment and tighter control. When more parts are involved, more can go wrong. Soil growing is less technical, which often makes it easier to manage over the long run. If you want a setup that feels steady, practical and less fiddly, soil still makes a very good case for itself. Not every growing medium is all upside, though. Soil has its drawbacks, too, and that is where the next section comes in. A larger indoor soil grow setup with cannabis plants in fabric pots Cons of Growing Cannabis in Soil Soil Usually Means a Slower Grow One of the main drawbacks of growing cannabis in soil is speed. Compared with hydroponic systems, soil grows tend to move a bit slower, which usually means a longer wait from seed to harvest. That is not always a bad thing, but for growers chasing faster turnaround times, it can be a downside. A lot of that comes down to how nutrients are delivered. In soil, the plant has to work through the medium, while hydro gives roots more direct access. If speed is your main priority, hydro will usually have the edge. You Have Less Direct Control Soil is more forgiving, but it also gives you less precise control over nutrient levels. That can make it harder to correct problems quickly if a cannabis plant starts showing signs of deficiency or imbalance. With hydro, adjustments tend to happen faster. In soil, things can take a bit longer to show and a bit longer to fix. For some growers, that is a fair trade for simplicity. For others, it can feel like working with one hand tied behind your back. Watering Can Be Harder to Judge Water management is another area where soil can trip people up. It is easy to overwater cannabis plants in soil, especially for beginners who think more attention always means better results. Too much water can lead to poor root development, drooping growth and, in worse cases, root rot. You do get better at reading the pot, the weight and the condition of the soil over time, but there is still more guesswork involved than some growers would like. Watering cannabis plants in soil can be harder to judge than it looks Soil Can Attract Pests and Disease A living soil can do a lot of good, but it can also create the right conditions for pests and disease if the grow is not kept in check. Fungus gnats, mould issues and other unwanted visitors are all easier to run into when the medium stays too damp or the environment is not properly managed. That does not mean soil is doomed to disaster. It just means prevention matters. Good airflow, careful watering and a clean grow space go a long way. Final Tokes on Growing Cannabis in Soil Soil still has plenty going for it. It is simple, reliable and a solid choice for growers who want a more natural growing medium without the extra complexity of hydro. At the same time, it is not perfect. Slower growth, less control and the risk of overwatering are all part of the deal. That is really what it comes down to. If you prefer a more forgiving
The Bulldog Seeds x Mills Nutrients: Cannabis Seed Germination Tips with the Mills Seed Starter Kit
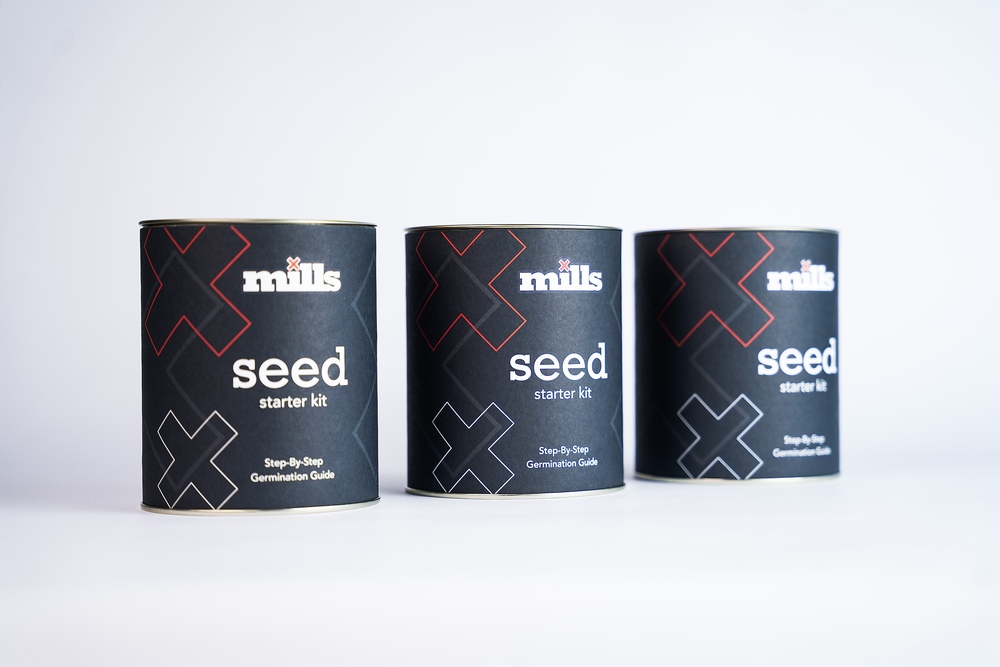
The best growers will tell you, your grow doesn’t start when you see green. It starts the moment your cannabis seeds hit the medium. Mess up germination and you’re firefighting along the long road to harvest. Uneven starts mean uneven canopies. Slow roots? Slow everything. Get some solid germination tips and you’re golden. That’s why The Bulldog Seeds teamed up with Mills Nutrients to bring you the Mills Seed Starter Kit, the best way to get your cannabis seeds from package to pot. What Seeds Actually Need to Get Moving Forget overcomplicating it. You don’t need to wear a lab coat to germinate cannabis seeds. Get the basics right and leave the science to the Mills Master Grower, so he can leave cookie crumbs on the office sofa. Moisture, not a flood – keep them gently hydrated so they can breathe. Drown them and you’re throwing a tiny plant water funeral. Stable warmth – 22–25°C is the sweet spot. Too cold and they sulk, too hot and you’re frying them like an egg. Oxygen and airflow – stagnant, soggy air kills roots before they’ve even had a chance to grow. A gentle feed – the Mills Start-R included in the kit gives them just enough fuel to get rolling without burning them out. . Why Germination Goes Wrong (and How to Avoid It) Most problems aren’t bad genetics; they’re bad habits: Overwatering – roots need air, not a swimming pool. Temperature swings – keep it steady Poor airflow – stale air is fungus’s best friend. Feeding too early or too strong – seedlings don’t want a three-course meal, just a light snack. Messing with the taproot – hands off. Let nature do its job. What’s Inside the Mills Seed Starter Kit (and Why It Works) The magic is in the simplicity. The kit keeps your early stage tight, clean, and stress-free: Mills Start-R (250ml) – kelp-derived hormones + light bio-mineral nutrients for strong roots. Germination Tray – holds your environment steady. Propagation Cubes are pre-sized and perfectly balanced for moisture and oxygen. Measuring Pipette – because a drop too much can be the difference between thriving and frying. Set it up in minutes, and you have a low-maintenance, high-success germination station. Final Tokes: Mills Nutrients x The Bulldog Seeds If you want big yields, it starts with healthy seedlings. Get them germinating cleanly, rooting deep, and sliding into the veg like our Master Grower does into supermodel DMs. The Mills Seed Starter Kit makes that happen so you can grow your legend without the hassle of messing up germination. Whether you’re new to cannabis seeds or have been growing since The Bulldog logo was first painted on a wall in Amsterdam, this kit will make your early phase smoother, faster, and less stressful. Start strong. Grow strong. Mills Seed Starter Kit — The Bulldog Seeds x Mills Nutrients quantity Add to Cart
Germination Guide

What is Germination? Germination is the biological process that activates a dormant cannabis seed, signalling it to grow into a seedling. When exposed to the right conditions (moisture, warmth, darkness, and oxygen), the seed absorbs water, swells, softens and eventually cracks open. This allows the taproot (the plant’s first root) to emerge and anchor itself into the growing medium. Germination is the biological process that activates a dormant cannabis seed, signalling it to grow into a seedling. When exposed to the right conditions (moisture, warmth, darkness, and oxygen), the seed absorbs water, swells, softens and eventually cracks open. This allows the taproot (the plant’s first root) to emerge and anchor itself into the growing medium. Step-by-Step Guide to Germinating Cannabis Seeds Step 1: Select High-Quality Seeds When you order cannabis seeds online from TB Seeds. You get healthy, mature brown, firm, and uncracked seeds that set you up for the best germination success. Cannabis seeds that are soft, pale or damaged may not germinate. Step 2: Choose Your Germination Method & Prepare Materials The next step is to choose a germination method that suits your setup and experience level. Germination Methods: Paper Towel Method (Most common & effective) Direct-to-Soil Method (Preferred by organic growers) Water Glass Method (Quick pre-soak for tough seeds) Rockwool or Jiffy Pellets (Great for hydroponic grows) Step 3: Gather the supplies See below the list of everything you’ll need, no matter your chosen method. Paper towels (for paper towel method) Distilled or pH-balanced water Tweezers (to handle seeds carefully) Small plate or container Rockwool cubes or Jiffy pellets (for hydroponic methods) Seedling heat mat (optional, but helpful in maintaining warmth) Step 4: Germinate Paper Towel Method (Common) For this example, we will use the most effective and standard method of germinating cannabis seeds, the paper towel method. Place seeds between two damp paper towels (not dripping wet). Lay them on a plate, cover them with another plate, or place them in a sealed plastic bag to maintain humidity. Keep in a warm (20-25°C), dark place like a cupboard or drawer. Check daily. The seeds should sprout within 2-5 days. Soil Method (Natural & Beginner-Friendly) This one is the easiest one to perform. Plant the seed directly into lightly moist soil, about 1cm (½ inch) deep. Cover the hole loosely with soil—don’t compact it too much. Keep the soil moist but not soaked, and maintain a warm temperature (20-25°C). Expect sprouting within 4-7 days. Water Glass Method (Pre-Soak for Tougher Seeds) Here is another method requiring the taproot to be transplanted once the cannabis seed has germinated. Fill a clean glass with lukewarm, distilled water. Drop the seed inside—if it floats, gently tap it down. Allow the seed to soak for 12-24 hours, but no longer to avoid drowning. Once the seed sinks or cracks open, transfer it to soil or the paper towel method. Rockwool/Jiffy Pellets (Best for Hydroponic Grows) Using Rockwool or Jiffy Pellets might appeal to you if you grow hydroponic. Pre-soak rockwool cubes or Jiffy pellets in pH-balanced water (5.5-6.0). Place the seed inside the medium in a warm, humid environment. Ensure consistent moisture and warmth for the best results. Step 5: Transplanting Sprouted Seeds This next step requires the grower to be gentle, and it is where the tweezers come in handy. Once the taproot reaches 1-2 cm (½-1 inch), it’s time to transplant. Handle seeds with tweezers, not fingers, to avoid contaminating or damaging the taproot. Place the seed taproot in its final medium (soil, coco, or hydro). Cover gently and keep conditions warm and slightly humid. Step 6: Don’t make these common germination mistakes Germination is simply, but it can go wrong. Avoid these common germination mistakes to ensure your crop gets off to the best start. Overwatering – Too much moisture can lead to seed rot. Keep paper towels damp, not soaked. Wrong Temperature – Too cold (<20°C) or too hot (>28°C) can slow or prevent germination. Touching the Taproot – Always use tweezers; oils from your fingers can damage delicate roots. Planting Too Deep – 1cm is ideal; planting deeper may cause slow or weak growth. Step 7: Germination After Care The job is not done just because the seed is sprouting. There are extra steps you can take to look after baby seedlings. Provide gentle light (CFL or LED) 18-24 hours daily to prevent stretching. Keep humidity at 65-70% to promote healthy early growth. Water sparingly. Overwatering can cause damping off (a fungal disease that kills seedlings). Avoid nutrients in the first 1-2 weeks. The seedling has all the nutrients it needs from the seed shell.